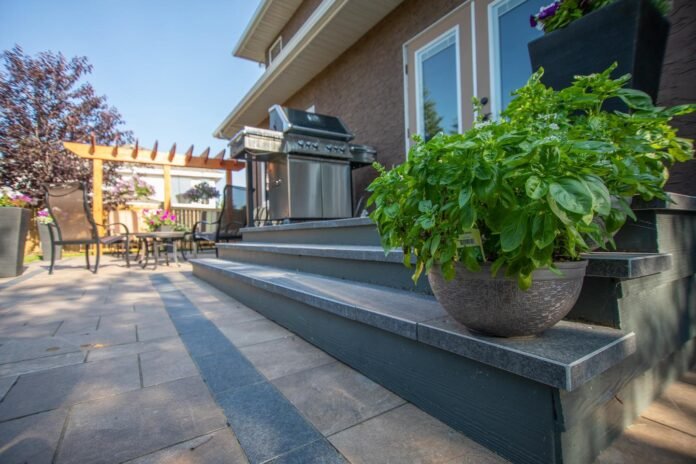
Are you thinking about adding new deck tiles or building a new stone deck? If so, then this article is specifically for you.
Deck tiles are an easy and classy project for first-time DIY craftsmen. The deck tiles used for such projects are easy to install and offer a classy modern look to any space. The best part about such projects is that these can be completed in a single day, and normally these projects complete without a hitch.
If you are unsure what deck tiles are and if they are right or wrong for your project, visit tanzite.ca for all information regarding deck tiles, stone deck, and patios.
How Tanzite deck tiles are made?
Table of Contents
The tanzanite or tanzite deck tiles are manufactured using immense heat and pressure like the lab-created diamonds. This results in a unique and incredibly resilient to external factors, including weather and daily wear and tear. Plus, tanzanite deck tiles are without the flaws characteristic of natural stones.
Tanzanite deck tiles are perfect stone tiles with perfect color and are designed to last the harsh outdoor conditions for a lifetime.
Installation of Deck Tiles and Required Materials List
As far as the installation is concerned, you won’t need a lot other than the actual tiles. Below is a short list of materials that might come in handy for your project.
Deck Tiles – First and foremost, the deck tiles. It is always wise to order approximately 10% more than what is required for the project at hand. The extra tiles will come in handy to cover up the wastage caused by the cuts for design.
Borders – If your planned design calls for a border and you are planning to install one around the stone deck tile work parameter, we advise that you measure the product needed for the project.
Hand Sander – hand sander is not particularly needed for the stones deck tiles. However, if you are going for the wooden alternative, you will need a hand sander to smooth off the cut-sharp edges.
Cardboards – To make precise cuts for the tiles, say around a beam or pipe, it is always beneficial to use a cardboard cutout that is stenciled-cut around the said beams or pipes – making a perfect stencil to cut the actual tiles. This method is incredibly easy and cost-effective.
Pencil/pen – Pen or pencils are required so that you can make measurement markings easily if the tiles need a cut to fit properly.
Measuring tape – You will definitely need the measuring tape as you work on the deck tiles project. A tape measure is needed to measure out the tiles, but it is also required to make precise marking on the area you want to cover with the tiles or build a stone deck on.
Install deck tiles in a capital “T” format
For starters, you will want to make a capital letter ‘T’ shape with the tiles for the project. Position the ‘T’ so that it aligns with a straight wall.
Pro-Tip: Ensure that you leave enough space for the border if you plan to install one.
Moving on, in the middle of the shape ‘T’ position, another line of the deck tiles, perpendicular to the first line creating ‘T’. Once this is done, you can move on to simply running the rest of the tiles together. Many tiles come with male and female snaps so that you won’t need glue. Plus, if you need to move a tile, it will only take a snap to do so.
Precise Cutting and Fitting of Deck Tiles
For the required cuts according to the planned design, you will initially have to measure out the area that needs the altered/cut tiles. Use the tape measure, and measure all specific areas that need adjustment.
If you have to tile around a pole, ensure that you measure thoroughly around the pole, and then make a stencil mark on the cardboard cutout. Draw the shape on cardboard that needs to be cut out/ removed from the tile. Then cut out the cardboard neatly to the shape, test the shape out on the actual placement, and then transfer the resulting shape onto the deck tile. This is how you can ensure that your tile cut is accurate.
Pick up your jigsaw and precisely cut out the final shape you transferred onto the tile. Once you are done with the cutting, sand the sharp/rough edges for a smooth finish, and install the tiles as you have done for others.
Trust us, for what it is worth, a new deck tile area or a new stone deck can add a lot of value to your property. Additionally, when it comes to Tanzite Stone Decks, patios, walkways, or anything else made out of Tanzite stone tiles, your property can become the envy of the neighborhood.


