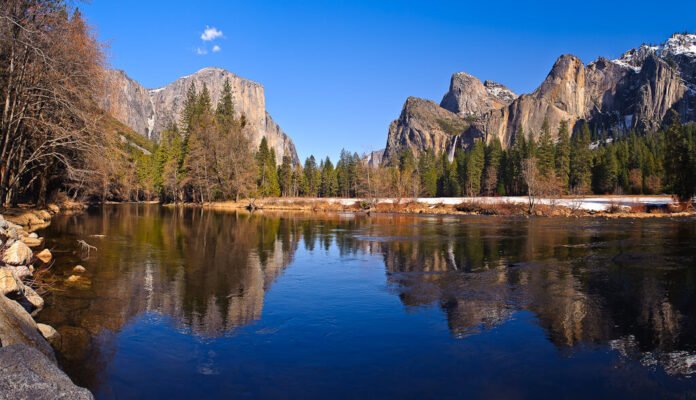
Panoramic photography refers to a broad range of photo images produced by taking a series of shots from a single point, then stitching them together into one complete scene. The result is an image with extensive coverage.
This unique technique has been in practice for decades and is widely used by newspaper photographers to capture bigger events like; any protest or sports. Besides, panoramic photography further serves a specific purpose for landscape photography, allowing viewers to explore places they might not be able to visit in person.
Different types of Panoramic Photography
There are two main types of panoramic photography;
Wide-angle Photography– This type should be used whenever you need to capture as much detail as possible. For instance, while capturing a landscape or an attractive building.
An excellent way to achieve this type of panoramic shot is by using a short focal length lens and panning the camera to take multiple shots.
Fish-Eye – This type should give the viewer an exciting perspective, such as when photographing people or interior space. The best way to achieve this type of photo is by using a wide-angle lens and rotating your body while taking multiple shots.
These were the main types of panoramic photography. Now, let’s discuss the types of panoramic shots used for various purposes.
Types of Panoramic Shots
The type of panoramic shots include;
• Cylindrical – Cylindrical is the most popular, yet common one used for shooting landscapes
• Spherical – spherical is most common for architecture
• Flat – most common for stitching together multiple photos of faces.
Each has its own subtypes as well. However, the main reason why cylindrical is widely used for shooting landscapes, and spherical is only for architecture, because both styles have a bigger role in the way these images are projected onto a surface.
The cylindrical projections are mapped onto cylinders, making it need to know how to use a digital camera to take panoramic angles. Here’s the answer.
How to Click Panoramic Photo with Digital Camera?
Table of Contents
To create a panoramic photograph, you will need to learn some basic photography skills;
- First, you need to take accurate levels and photos with a high degree of precision.
- Secondly, you should understand the different types of panoramic shots, and appropriate use them.
- Third, you will need to know how to use a digital camera to take panoramic angles.
Once you get strong command in practicing these photography skills in Calgary, it’ll surely open ways for you to build and settle your career in photography. This artistic career can prove to be highly profitable in the future.
Here’s a quick look into primary outlines you can expect to learn while taking any panoramic photography course.
Sneak Peek into an introduction to Panoramic Course
If you’re planning to register for any course of basic introduction to panoramic photography in Calgary, then let me guide you on what you’ll be trained with.
First, they’ll introduce panoramic photography; you’ll be advised about shooting a sequence of photographs. They’ll teach you to take photos 360 degrees horizontally (from left to right) or vertically (from up to down).
Then, you’ll see how these photos are combined into one large image using special stitching software. The final result can be printed as a high-quality poster with an immersive 3D effect.
To learn panoramic photography, one must know how to;
– Use a tripod
– Take panoramic photos with a digital camera
– Art of stitching photos together & correcting all stitching errors
– Creating a cylindrical projection
How to blend the Exposure of different shots taken at different angles?
- As you take multiple photos at one time, so make sure all these photos have an identical exposure. If not, then your software will only blend the correctly exposed images.
- To adjust the exposure of an image or set of images, make such as a hill or rooftop, and can be taken with any type of lens. As long as you can take accurate levels and photos, you should be able to capture an interesting panoramic shot.
- You should simply make sure that your shots overlap by around 30%, set your camera to manual focus, use a consistent aperture (such as f/8), control the exposure manually, and ensure that all the images are identically exposed.
For more detailed guidance, sign up today at Photography courses in Calgary, and learn all that you’re willing to be an expert photographer.


